background

Showing posts with label closet. Show all posts

Tuesday, May 5, 2015

DIY: Linen Closet Makeover

Remember last year when we put in an Elfa closet in our pantry? We loved it so much that we decided to do our upstairs linen closet this winter. Not only does this make a great indoor project, but the Container Store offers 25% off Elfa products each January. Did I mention that you make an appointment with a designer who walks you through various configurations to find one that suits your needs and budget? We just had to take our measurements with us and make an appointment (weekends during the sale are crazy!)

The wooden holders that were removed from the inside walls of the closet
We began by removing the wooden shelving that was already in our closet. The shelves were bowing and the space wasn't idea for our linens, vacuum and cleaning products.

Since the closet had been painted and there were areas that were covered with wood, the paint seams were uneven. My husband had to sand them down so that the new paint would provide even coverage.
Scraping the seams
Sanding

We were puppy sitting the week we decided to this. Here's our little helper, Buster :]
It's certainly difficult to see in this photo, but we painted the inside of the closet grey. In our first Elfa closet project I had purchased 'oops paint' from Home Depot for $3. There was still half of the quart left it covered the entire inside of the closet.

Painting

All painted!

The Elfa solutions are so easy to install. My husband had them up as soon as the paint was dry and I went to organizing shortly thereafter. There's even ample space for our vacuum too! We've also added a hanging rack to our door now that we know it'll close with the vacuum inside. It's great for the little things that often get lost in the closet - nail polish, shoe polish, toilet paper, bath bombs, etc.


Thanks for stopping by the Humble Hammock and looking around! Do come back :)
Cara

Tuesday, June 24, 2014

Perfect Scents

Since I was a little girl I have always taken pride in scent that my mother presented in our home. When I started dating my fiancé, he would constantly comment that my parent's house smelled like Christmas. I knew that once I left apartment life (where some scents are beyond your control) that my home would need to take on a smell all of it's own.

Here are a few of my favorite scent tips to keep your spaces fresh and welcoming!

I purchase drawer and closet sachets (fresh scents) from BedBath&Beyond, Meijer or Target. Shoving them in drawers, sticking them in-between towels and even placing them in the car (good idea, Ryanne) are surefire ways to keep your closed spaces smelling top notch. You can buy them in packs of three or individually. I've found them sold separately on clearance from time to time, but I can usually commit to one scent long enough to buy a package. These little guys last 6 months to a year and I try to keep them from getting on the bottom of a stack of clothes or towels so they can do their job.


Scentsy warmer's may have been a hype for awhile and some may consider them overrated. I don't care if you're using something similar, but I think we all know what product I'm generally referring to here. This warmer has served as one of my favorite methods. Instead of whipping up fresh cookies every time I have guests, I just flip the switch and let the house fill with a warm, luring aroma. I don't purchase the Scentsy refillable wax as I can pick it up from the grocery for much cheaper. When the wax has lost it's scent I use it for my next smelly trick, homemade candles.


Homemade candles are awesome because they're made from recycled wax from the wax warmer. I've alluded to this trick before in DIY Edition: [Jars]. Once the wax burns up from the candle I simply clean the glass and start over!

On my 18th birthday I asked my parents for a cedar chest. They took my request and visited a local Amish woodworker to see what he could put together. This little gem holds nearly every blanket in my possession. After sitting in chest they emerge smelling like a crisp fall day. Hands down, this is my favorite scent staging method.


What are some of your favorite tricks for staging your house with smells? Do you have any tips for getting rid of unwanted smells? Share below!

Thanks for stopping by the Humble Hammock and looking around; do come back!
Cara


Thursday, February 27, 2014

Decorate: Kitchen Whisks Worth Taking

Kitchens serve, in my opinion, as the most versatile room of the house. In our kitchen, friends gather with glasses of wine to chat, celebratory sweets are baked, breakfasts are made, and dinners are both hastily and leisurely crafted. When we bought our first home I knew that the kitchen had to be nothing short of functional and balanced. I spent time mulling over how I would make it even more organized and functional. Also, being a half-link [or something near that] I knew that my tall cabinets were potentially going to be my biggest enemy, more so than the ceiling fan cord. 

While planning a wedding, one of my friends shared that there should be one item that you splurge on and feel guiltless for adding to the big day. For this project I kept the same thing in mind and splurged. I’ll delve, but also give some budget friendly alternatives. So with that, here are my kitchen modifications. 

Let's get the elephant out of the room and address my splurge item, the pantry closet. Before the makeover, the closet wasn't BAD but it really wasn't functional. Did I mention that after setting a box of cereal down one day that the entire shelf came out of the wall? That aside, we visited The Container Store and invested in a custom Elfa configuration for our space. It was EASY. Like A,B,C & 1,2,3; seriously. We measured our space, took the numbers with us to the store and had a designer help us built a closet. If you consider this, MAKE AN APPOINTMENT or you may have wait around a couple of inconvenient hours like we did. I mentioned that this was my splurge, but Elfa has a huge sale at the beginning of the year for 30% off. Naturally we took advantage.. I won't bore you to death with the awesomeness of Elfa, but just know that if you take time to learn about a closet system that is designed to hang on your wall rather than pulling out of it when weight is added, you'll love it too. As far as pantry prep, I bought some basic drywall putty from Home Depot and patched the walls. I repainted them because the putty had to be concealed. For this, I found some ‘oops paint’ as Home Depot calls it. It was a neutral so I was safe using it in such close proximity to our tan kitchen walls. Since, I've found the variation in color is actually quite nice. It took about ¾ of a 1 qt. can to cover the walls of this pantry. All in all, this patch and paint project cost me about $8.
Before
After

Next up, the floor. My honey, sweet as he is, was a little careless when putting in our waterline and managed to use the refrigerator much like a Ditch Witch and dug a trench in our beautiful hardwood floor. To help cover up his mistake and create a little color interest, I went searching for some rugs that had a hint of vintage appeal. I landed at Garden Ridge and paid $5 per rug. Here's a HUGE explanation of the store's offering by Thrifty Decor Chick. Now with rugs, you get what you pay for. I washed one of these little gems and threw it in the dryer after spilling some dinner remnants. It shrank by nearly one-third! I managed to snag one more before the store sold out and replaced the boo-boo. I’ll resort to washing and hang-drying in the future. Here they are preventing more blemishes during the next home project...


Following the rugs were my salt & pepper shakers. I've seen LOTS of pairs floating around antique and thrift stores. My first set was a Bass fish cut in half with a tail for salt and a head for pepper. I then got some quaint little birds from a reward program but they were really meant to be on the table and not for serious seasoning. Recently, my grandparents were cleaning out their breezeway and gifted me a whole box of vintage alcohol in travel sized bottles. Ironically these two glass Cohodas Vineyards old glass dogs once held alcohol, but they’re serving their purpose far better on my stove top. Last weekend I saw the same pair in an antique store for $11 each. Not a bad find and they certainly have a resale value! 


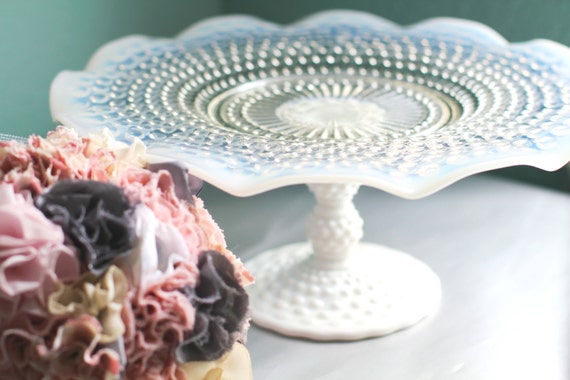
 Last up is this vintage-inspired key holder. Our kitchen, being right next to our garage, not only has lots of cooking utensils and food, but shoes, keys, mail and whatever else is unloaded from the cars. I ended up getting this cake stand from my Grandma last fall but it didn't have a dome lid. So, I use it as a key drop. It’s practical, fancy, accessible, and matches my decor. Be warned that it isn't shatter-proof so if you have a key lanyard, be sure that you don’t move the cake stand with the keys! The cake stand and dome at an antique store or yard sale can be expensive. I've noticed the milky white patterns or clear-colored glass also being more pricey, especially if they’re a reputable brand. If you’re searching you should be able to find one for $10 or less, especially if it doesn't have a lid or a fancy collectible name. For a list of names to avoid [or pursue if you want this to be your splurge item] check out the cake stands on  Ruby Lane.

Thanks for stopping by the Humble Hammock and looking around; do come back!

Cara