How do I do it; you ask? How do I know what will go with the rest of my decor? Truth be told, sometimes I don't. If I fall in love with a piece and have to have it but it doesn't go with anything else I have, then I may use it for a gift or start a new space. Here are some images I've snapped over time and the vintage finds they have later inspired. Mind you, these were phases and not violet womanly mood swings that I endured over a weekend [not that you were thinking that...].
Over the summer there was a little festival on the Monument downtown Indianapolis. I snapped this inspiring shot one afternoon and later stumbled across a quaint tin a week or two later. I was obsessed with the Ferris wheel and the symmetry that the monument created behind it. Pretty strange how my subconscious was also drawn to this [now] hair-tie holder, right?
On my way to a photo shoot one morning I stopped in a small town outside of Terre Haute, IN and caught a frame of this stunning door. A few weeks later I picked up another trending item, the
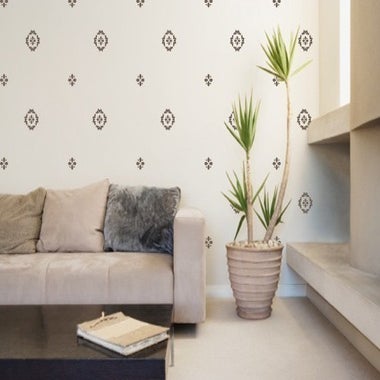
old wooden framed window. I printed some photos on 8.5x11 photo paper and taped them on for the time being. Once I tire of that look I'll add some
wall decals that also work on a trillion other things [I'll have another post about that at some point]. I found this window for $15 but talked the antique store down to $10 as I bundled items together at the check out. Bundling is a 'picker trick' that requires negotiating. If I buy a big item and some smaller items for instance, I can haggle the price down a bit since I'm buying more. If the store is comprised of lots of vendors they may not do this, but in my instance the owner of the window happened to be the cashier and cut me a deal. Similar windows sell for an arm and a leg as
Pinterest users well know.
 |
| Wooden barn window from Peru, IN for $10. |
While walking to the post office one afternoon I snapped this cozy shot of one of the coolest buildings in Indianapolis;
The Blacherne. I love the sleek black lines mixed with the floral landscaping and the brick. That led me to pop the glass and backing out of an old frame and use just the frame to string some jute [baler twine works great too]. I then added some of my favorite
Instagram shots by hole punching the printed photo and hanging with a safety pin. A pretty easy craft [no really].
 |
| Recycled frame + photos that cost nothing. |
Now this may be the most far-fetched yet! This photo was captured in French Lick, IN on my drive home. I loved the color of the bricks against the sky, and beyond that the shapes of the window frames. I harnessed that shape into this potpourri holder [turned tooth brush holder] and put it into my bathroom. I love the crackled glass look and the imperial look of the holder's top. Such an easy find and it can always go back to holding potpourri. I bought this gem at an antique store that's no longer in business. It wasn't an antique [it was a reproduction] but it still satiated my itch.
 |
| Potpourri holder turned toothbrush holder for $5. |
This isn't how I find every piece, but it's a great way to find what inspires. Once an item looses it's pizzaz I pass it on. Hoarding is one of my biggest fears so I don't keep things forever. Once I've gotten my joy out of them I help them find another home.
Thanks for stopping by the Humble Hammock and looking around; do come back!
Cara


