background

Wednesday, March 23, 2016

Upcycled Patio [Pt. 2]

If you missed out on the initial stages of the patio makeover, take a moment to get up to speed. Then join us here...

As new homeowners it was fair to assess that we knew very little about anything. Since we were going to learn as we went anyway, why not create the patio of our imaginations, right? 

After searching on Google and Pinterest, I came across this inspiration and showed it to my husband. We agreed that not only did it look feasible for our skill set, but affordable too. So we started noodling the numbers to estimate what we should expect to spend with landscaping stones/seal/glue, mulch, edging materials, plants, and patio furniture.


During the winter months we spent our time perusing Menards for the retaining wall rock. The plan? Leave the concrete pad and build a rock wall on three sides with two openings to enter and exit the space. We settled on Catalina (tan) from Menards and ordered it in store. 


Fortunate for us, Menards delivered the 2,000+ pounds of rock. But they did so on the rainiest spring day Indiana could conjure and they had to park the semi in the street while using the fork lift to unload two pallets in our driveway rather than our back yard. Yours truly got to gopher them through the garage before stacking them in our workspace so as to save the yard while Andrew was traveling for work. I have to admit, I did take a lot of pride in that...


After my Herculean efforts I decided to plow forward with other parts of the project while Andrew was swooning over his precious wall. I've always thought my freehand lettering was relatively decent so why shouldn't I be able to "free shovel" the curvy edging for our landscaping? Here's my progress...


The trick is to really hollow out the space for your edging. It's easier to fill in a space that's too deep and adjust as you're laying it and fill in the dirt with your hand as you go. 


You've heard me say it before... one man's trash is another man's treasure. Sorry to be so cliche', but it's true. In true fashion I sold these pallets to other DIYers on our local garage sale site so that I could buy flowers for this new space!


While edging (see progress behind the bulbs) I got distracted by these plants that have continued to come up in the middle of our back yard. In my current shovel-obsessed state I left no bulb unearthed and replanted them in the new space where other landscaping and plants would reside.

UPDATE: they did return this year but have yet to produce a flower. :(


Meanwhile, in retaining rock wall land...


And then while I was on a bachelorette party to Las Vegas he and his brother finished this masterpiece! 


Now this next part intimidated me the most. Most that know my experience with plants know that I do not possess a green thumb. In fact, I'm pretty sure I've returned five or six succulents to Home Depot because I have no idea how to make them happy. 

During this process there are two humans, constantly wrangling the lines of thrifty and "this doesn't look thrifted" to come up with solid landscaping options. This first beauty (which we bought two of), was on super sale for $6. It's an Azalea which I am happy to report DID survive through the winter.


Quick rabbit hole.. My husband is still driving his "truck" from high school and their love runs deep. We can debate the term "truck" on another blog post, but I often entice him to prove truck-like attributes. This ended with him severely overloading the cab and bed with more plants than I could possibly kill in one afternoon and gave me one of my favorite homeowner memories.


Those five precious arbor vitae that you see in the back were planted that afternoon. Yes, they too are still alive and well (believe it or not)! You can see my edging work below too - before we plucked the grass and mulched.


Slow but sure, it's come along!


I hate mulch. I think fresh mulch smells like dog poop and I hate putting it all around my house so that when outside all I can think is that someone is slacking on the poop scooping. None the less, Andrew insisted we get mulch, so we visited Edgewood Feed and Seed and settled on the deep brown option from their sample box. Which yes, is even further reminiscent of the poop simile.


Mulching isn't anything to write home about - especially the first time you cover all of the space you want to much. Three or four yards later (I forget honestly), after unloading it in the blazing sun and pouring down rain I was just happy to be done. 


When we did finish mulching, Andrew laid grass seed along the edging to fill in the areas we'd disrupted during our project. It grew very well and was filled in before the end of the season.


I even did edged the side bed too. After we bought three burning bushes I learned that they're not indigenous to Indiana. Unfortunately for me I was face-to-face with a forester and had to appear revolted when she told me that her sister had tried to put the horrible plants in her landscaping. I guess the bonus is that they haven't technically turned red and proven to us that they're truly burning bushes so that makes me feel less guilty. :|


Projects like these don't really end in your back yard. Before you know it the front yard looks like garbage against the remnants that peek through in the back. Which led to this...


Then this...


And now... do you remember what we started with?


Here's the transformation!


When it was all said and done it came together really nicely. We've already made additional improvements since this was taken late last summer, but what a transformation!

Side note, continue reading to learn about our patio set and how I stained it.

Thanks for stopping by the Humble Hammock! What questions did you have from this project?

Thursday, March 17, 2016

Upcycled Patio [Pt. 1]

I was apprehensive to showcase our "shabby" patio space, but now that we're on the other side of the renovation and landscaping, I'm more at ease in sharing the before and after. 

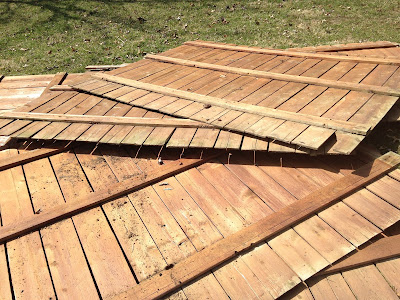
Here's what our space looked like on our official day of demolition. A concrete pad had been poured and used as a space for a hot tub. More than 200 landscaping pavers were sloppily laid to extend the pad and then a privacy fence was erected to complete the space. Maybe it worked for the family before us, but it was certain we'd remove it after we endured our first winter in the home.  

First fence panel comes down!

The fence came apart pretty quickly and I snapped images of the salvageable panels before putting them on our local township garage sale site on Facebook. My husband thought I'd lost my marbles. "Who would want a crappy old fence, Cara?" 

He changed his tune when a line quickly developed to claim the fence and we made a whopping $40! One man's trash is another man's treasure...


I mean, it's not like they looked THAT bad. I determined I'd do some sort of crafting with them if they weren't claimed. 


The fence posts weren't as easy to remove. We dug most of them up but did end up leaving the concrete of one in the ground. I also listed these on our local township garage sale site on Facebook and helped a gentleman load them into his truck the following afternoon. We gave them away but we didn't have to pay to haul them to the junk yard.


Then we pulled up all of those fungus covered pavers and stacked them along the side of the house. Although they were dirty, I knew a power washer would bring them back to life. I bet you wouldn't guess that I listed those on the same Facebook page and had them sold in the day too. We made $.50 each and upped the ante to $140 on our backyard recycle project.


Once all of the old fencing and stones were cleared, we were finally provided a clean slate. In the next week I created a drawing with a full landscaping plan and we began mapping how we would make this a usable space for entertaining. 


Thanks for stopping by the Humble Hammock! Check back for the finished project soon!


Sunday, January 24, 2016

DIY: Staining Patio Furniture

This was our beautiful new patio set. Shortly after placing it outside, a few birds did a fly over and sprinkled some mulberry droppings on the wooden top. I had to furiously scrub it down with vinegar water to keep the stain from setting into the porous wood.

Patio set before

I'd had enough. It was time to stain and seal the wood for longevity.

Some things to know before staining with a tinted sealant...
  1. Put the items to be stained in a temperature controlled environment and allow it to settle for a day or so. Our garage worked great for this as it is temperature controlled. If your garage isn't temperature controlled, look for a non-humid, cool day (fall is a great time of year for this).
  2. Paint multiple, thin layers of stain. Allow each layer to dry (shouldn't be tacky) before applying the next. The stain will gradually become darker with each layer.
  3. If you want minimal mess, tape off the wooden areas before beginning the staining.
  4. Find stain and supplies while your patio set becomes cool and controlled.
Prepped patio chairs and table before staining and sealing.
Up close of the taped off chair arms.
Who even knows where to begin when selecting the necessary products for sealing and staining? We went to the Home Depot and got the scoop from the paint staff there. You can use my advice, or seek theirs. Either way, here's what we gathered:

  • First, see the previously stated bullets above.
  • When choosing a sealant, consider whether you want it to double as a stain. If so, match it to other wooden items in the same area.
  • The tricky part is knowing how much you'll use. This project (a table and 12 chair arms) required less than 1/5 of the quart of stain. Thankfully I didn't listen to my husband and buy the whole gallon! :/
  • Choose a brush that is suitable for ALL PAINTS to use with a stain and sealant.
  • Stir the stain with the wooden mixing stick before use.

Staining and sealing products.

The top arm is original. The bottom arm has been stained with one coat.
To seal and stain the table, I started on the bottom. I only did one layer here and didn't bother taping since nobody can see the bottom. Afterwards I quickly flipped it over to look for runs from the sealant on the top of the table. I was sure to brush those out before applying three full coats.

Table in progress.
With nearly 4/5 of stain remaining, I decided to also seal and stain this bench that my friend made me years ago for my birthday. Since they are both in our back yard space, they now match and seem more cohesive.

Staining the wooden bench that will also be in the back yard.
Stay tuned for the final product when I do a tutorial this spring on creating and decorating a patio space!

Thanks for stopping by the Humble Hammock, do come back!


Monday, January 18, 2016

Baby Shower Fiesta Invitations


Have you ever planned a fiesta themed baby shower? No, but you want to? Okay, good, you're at the right place.

My friend decided not only did she want to hold her baby shower in a private room to a Mexican restaurant, but she wanted invitations, snacks, drinks and games to match. Here is my journey in creating the the mailed invitations.

This is the end product. If you don't like this, stop reading. No, I mean, why put yourself through the rest of this agonizingly detailed post if you're not going to make one similar to it? (Deep down you're saying thank you).... and if you are hoping to making one like this... proceed.


First, determine how many of these invites you're going to make. I settled on 40 so these supplies accommodated that number.

Step 1: Obtain envelopes and determine your invitation size. I wish I didn’t have my heart set on these envelopes with the stringed back from Michaels. They got me into trouble in the mail house so do yourself a favor and resist! For those of you who are handing out invitations this may still be an option. They were roughly $4.99 each and contained 20 envelopes. So, $10 later I had enough for my 40 guests. You can view similar envelopes in the Recollections collection at Michaels here.


Step 2: Choose paper for the backing of the printed invitations. You don't want flimsy white 80# copy paper coming out of your envelopes. The first impression isn't a memorable one and they feel cheap. Splurge on the $.10 per sheet and make your guests feel like this invite is to a party they won't want to miss! 


Step 3: acquire appropriate colored ribbon. These spools came from the Dollar Tree and set me back $1 each. Since I knew the length of the invitation I was able to determine how many yards of ribbon I would need. I recommend taking a few minutes to do the math so that you’re not stuck with an excess of supplies. The half spool or so extra that I had did come in handy for some finishing touches on the day of the shower so I was able to part with it pretty quickly.


Best advice for this entire project? Do NOT forget to include the registry information on the invitation! If you do, you’ll need to use these handy tags to stick in your envelopes. Be advised that the ribbon on the invitation acts like octopus tentacles when the invitation is removed during opening. This may send the important registry information flying into tiny crevices in the recipient’s home or car.    


Thanks for stopping by the Humble Hammock! Do come back!

Wednesday, September 30, 2015

DIY: Princess Peach Halloween Costume

My work crew decided to go as characters from Mario Kart last year. Being female and blonde automatically elected me to be Princess Peach. No matter, the costume was super easy to put together and cost about $12.

Here's how I would advise transforming into Princess Peach:

Start this project with a trip to a home improvement store. Pick-up a can of the cheapest pink spray paint you can find and procure a long empty box. 

Remove all flaps from the cardboard box with scissors and take it outside for a makeover. Spray paint the box by spraying a few inches from the cardboard to prevent running. For my box I used the entire can of paint and gave it a light layer all the way around.
                                                
This was my point of reference for Peach's car
                                                    
This Rustoleum paint was at Lowes and cost about $3


I painted wheels and head lights with craft paint and printed a quick decal for both sides. The tulle straps on the inside kept the car balanced from my shoulders so it looked as though I was sitting inside.

 Now for the princess skirt.

This roll of tulle was on sale at Hobby Lobby for $2.99. I bought a baby pink and hot pink to use for my costume. Both rolls had 25 yards. I used the tulle for my princess skirt as well as the bow on the car.


I simply used elastic, cut a strip as long as my waist, pinned it together in a circle and cut the baby pink tulle in one yard increments. To secure it I formed a loop (with the tulle even on both sides) and pulled the tulle around the elastic until it was secure. I then proceed to repeat 20 times.

Viola! Skirt!

My pink tank top body suit was actually my mom's from the 1980's. To add the poofy sleeves I simply cut the hot pink tulle and looped it around the tank top portion of the suit.

As for the crown, I started with some thick presentation board. I free handed the crown pattern, cut it out and bend it to shape. I then used clamps to secure the bend while hot gluing the seam. Once dry, I cut two tulle strips the length of the diameter of the inside of the crown and hot glued them in an 'X' fashion to the inside. This gave me something to put bobby pins through to secure the crown to my hair and keep it from falling off. 


For the jewelry, I used the same gems featured on the crown (the whole box was $3 at Hobby Lobby) and hot glued them to cardboard. I used tulle as the string, hot glued it to the cardboard cutout and slipped it on moments before the costume party.

Here is the final product!


Thanks for stopping by the Humble Hammock! What will you be going as for Halloween this year?

Saturday, August 22, 2015

How to: Buy a Car

Meet Penelope the Cruise... or as I called her; Penelope.


Penelope and I go waaaay back. When I was 16, this was my first car. We made it through high school, college and into my twenties together. A tragic side swiping a mile from my house and a faulty oil change from Honda (which completely ruined her engine) really caused me to think about finding a replacement. After she got a complimentary used engine from Honda, I decided it was finally time for us to part ways.

My parents have always driven Honda. Our family car, the Piece, had 417,000 miles before the timing belt broke and bent the head on the engine. It was always an underlying goal for me to break that record with Penelope. That bad oil change stopped the odometer at 309,770 and the new engine reset to 180,000 miles. 

The good news is, I had been keeping my eye on the Nissan Murano for a few years so I knew EXACTLY what I wanted when the time came to make the replacement. I began looking for the right year, color, and interior package but much to my dismay, they were very difficult to come by. After a couple of months, and a handful of disappointing test drives, I stumbled upon this little gem...


I learned quite a bit during my first car buying purchase and thought that it would be helpful to share.
  • If there's a list price online, it's likely not the same on the lot. Document the price with a screenshot and ask that they honor that price. If they don't, walk away from the deal.
  • Don't buy a car at night! You need to have good lighting to assess the imperfections of the vehicle and bring those into your negotiations. For example, if there was a big scratch in the paint, you may want to have them fix it before you buy it. Bringing it in a week later when you notice it won't provide any accountability on their end.
  • Decipher the mileage you'd like in a car. If you get a 3-5 year loan, you want to be sure that based on your driving habits, you won't owe more on the car than it's worth before it's paid off. If you drive 100 miles per day, you may want to buy a car that you can afford over three years, so that you don't owe more on it before the loan is due. 
    • Imagine you're in a car wreck and at the time, you owe $5,000 on the car. Based on mileage, the insurance company will only give you $3,000. That means you have to come up with the difference of $2,000 to repay your loan on the car before you can buy something else.
  • Read reviews of the car online! Search things like... "2013 Nissan Murano problems," or "2013 Nissan Murano issues." Know what other owners are saying are the pros and cons of the vehicle.
  • Show me the CarFax! But seriously... you need to know if the vehicle has been in any kind of fender bender. From my experience, if you read anything about the car frame being bent - move on!
  • Know what you want to spend. Set a number and stick to it! It's easy to get starry eyed in the car lot and forget what your budget is. It's better to be honest with yourself up front about what you can afford than to make the first car payment and realize you can't make ends meet.
  • Get pre-approved for a loan BEFORE you look. If you get into a bid war with someone else, or want to make the seller act fast, have that pre-approved check handy to seal the deal. I recommend keeping this check secret until you're really ready to solidify a number and buy the car. Don't tell the seller what your top approval dollar is or they won't be as inclined to come off the list price.
    • How do you get pre-approved? Call your bank and tell them you'd like to get pre-approved for a car loan. They'll run your credit score, check your finances, etc. Then a check is mailed to your house within a few days and you can keep it handy until you're ready to make a purchase. You cannot exceed the dollar amount of the check without another pre-approval from your bank. 
  • Find out if your vehicle will be under any warranties and if there are any recalls. Ask for the recall record too incase parts have not been replaced that should have been.
  • Haggle, Haggle, Haggle. Come prepared with comparable pricing on similar vehicles and specs. The more educated you are, the more leverage you have. I like to print a couple of copies of comparable cars, look up the value on AutoTrader, Kelley Blue Book, and more. 

Before & After
Happy car buying! 

Thanks for stopping by the Humble Hammock!
Cara